


Using Layers to Your Advantage in Lumion
Lumion embraces the notion of layers, allowing users to improve their productivity and elevate their creative tasks. Layers are useful in Lumion because they allow us to organize our scene, animate it

Layers are essential for organizing and managing complicated scenes in 3D software. Lumion embraces the notion of layers, allowing users to improve their productivity and elevate their creative tasks.

Layers are helpful in Lumion because they will enable us to organize our scene, animate it using layer effects, and use them to speed up the viewport. We observed something like this in the top-right region of the Build mode:
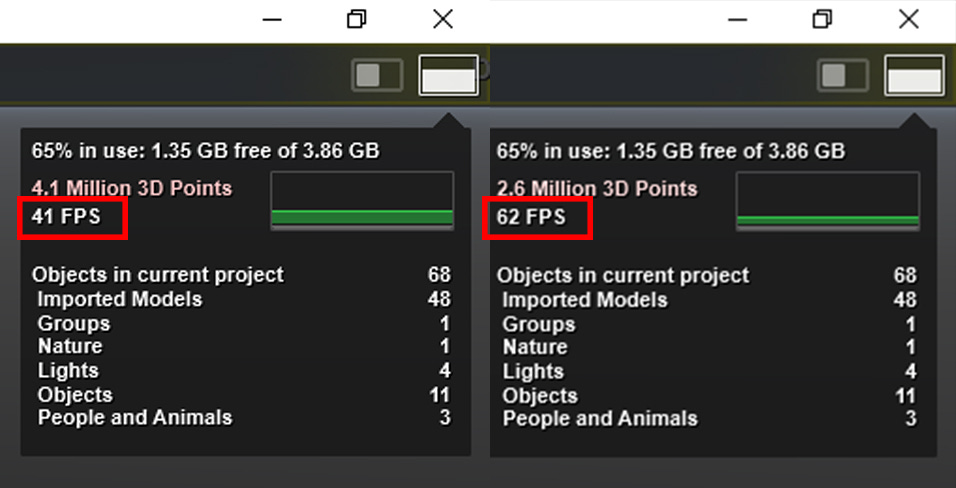
The value shown in the illustration above represents the number of frames per second Lumion generates. In the image on the left, the layers containing trees, plants, and additional stuff were activated, and the frames per second were set to 41.
When they are turned off, the frames per second on the right rise from 41 to 62. The greater the frame rate, the quicker the Lumion's viewing will be, and the amount of control over the scene will increase dramatically. As a result, we can observe how layer efficiency benefits.
Locating the Layers Menu
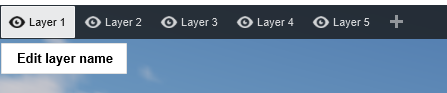
The Layers menu is unusual because it will be visible only if we work with the Import or Objects menus. When we click on the Import or Objects menu, a little rectangle with a number appears in the top-left corner, and if we move the mouse over the rectangle, the renowned Layers menu opens, as seen in the screenshot:
Working with Layers in Lumion
As mentioned, the default layer used when importing a 3D model or adding an object is Layer 1. However, we can customize the layer's name, add a new layer, and hide layers. How? Consider the following screenshot:
Utilizing Multiple Layers
Lumion supports up to 20 layers, encouraging users to exploit this feature fully for intricate scene compositions. We must first pick a layer and then add the 3D model in the same order the model is selected within the layer.
However, assume we completely forgot and must relocate specific 3D models to the proper layer. How are we going to do that? To begin, choose the 3D model by holding the Ctrl key and clicking and dragging with the left mouse button to make a selection rectangle around the 3D model. Then, as indicated in the figure below, we will choose the proper layer.

Now, begin your architectural future by downloading our FREE Basic Architecture Design Package with Lumion file! Discover the power of rendering and the endless possibilities of architectural design. To begin, please click the following link to obtain the file on our website:
Home: https://portfolio.hotrongnhan.org
Take advantage of this great chance to improve your skills and bring your ideas to life. Download today to open the door to architectural excellence!
Excited to announce that the Lumion rendering course I've created on Udemy has attracted over 4000 registrations! This course is tailored for architecture enthusiasts.
Check it out here: https://www.udemy.com/course/just-necessary-lumion-courses-from-basic-to-intermediate/?referralCode=4816CE05A8F30867FD14
Moreover, an exciting gift for aspiring architects is a free access code to experience the course. Drop me a message to get the code! Embark on this fresh, creative journey with us!
Explore our 3D model shop athttps://www.cgtrader.com/justnecessaryto acquire pre-made architectural exterior and interior scenes at competitive prices. Enjoy a 50% discount on any item of your choice by using the coupon code: 0C7E7D2BD5FE.
Embracing the potential of layers in Lumion opens a wide range of advantages, including more excellent performance to better scene organization. Layers will become an essential weapon in your creative gear as you look deeper into architectural visualization.